
Author: Scott Pletcher
Welcome to Part 3 of our Zero Trust Architecture application overhaul! In the first part, we added in a user identity store which provided us with lots of extra authentication and authorization features out of the box. In part 2, we architected a compartmentalized network and implemented some managed services and security groups to improve the overall security posture. In our final part, we will add some extra monitoring and access management features to give us more situational awareness and safety.
Our To-do List
- 1. Implement a more robust and complete user management system with MFA capabilities
- 2. Build out some compartmentalization for the various layers.
- 3. Segment out some of the parts to scalable managed services.
- 4. Build firewalls and shields around our public-facing portions.
- 5. Intelligently log and monitor all the activity around our app.
Wall ‘Em Up
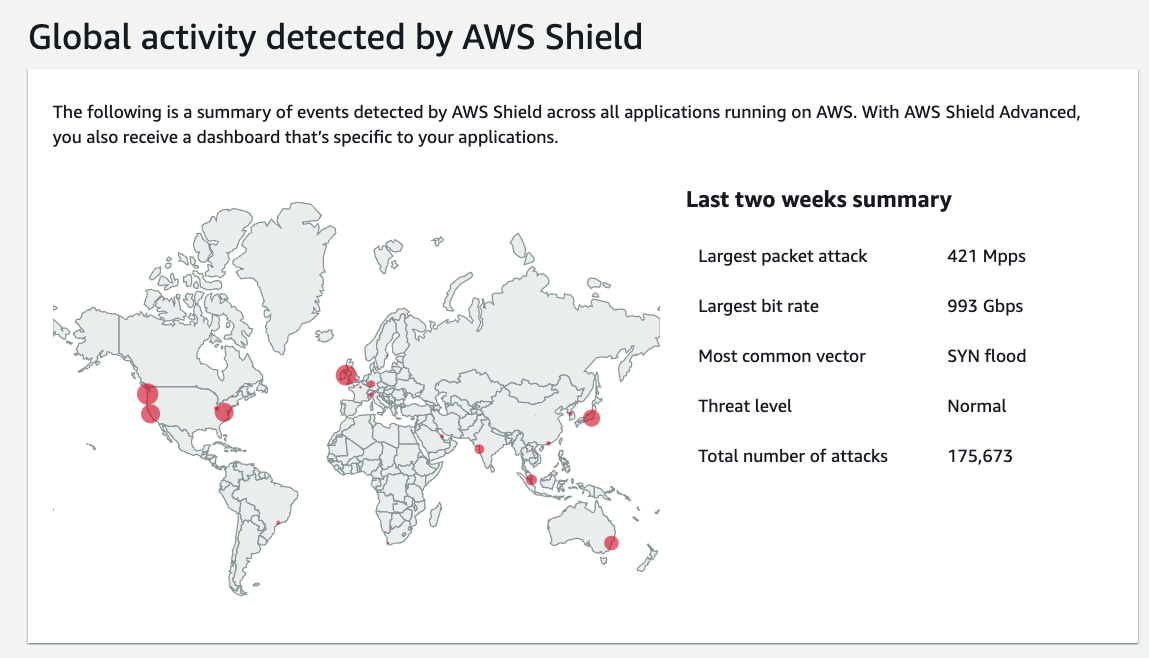
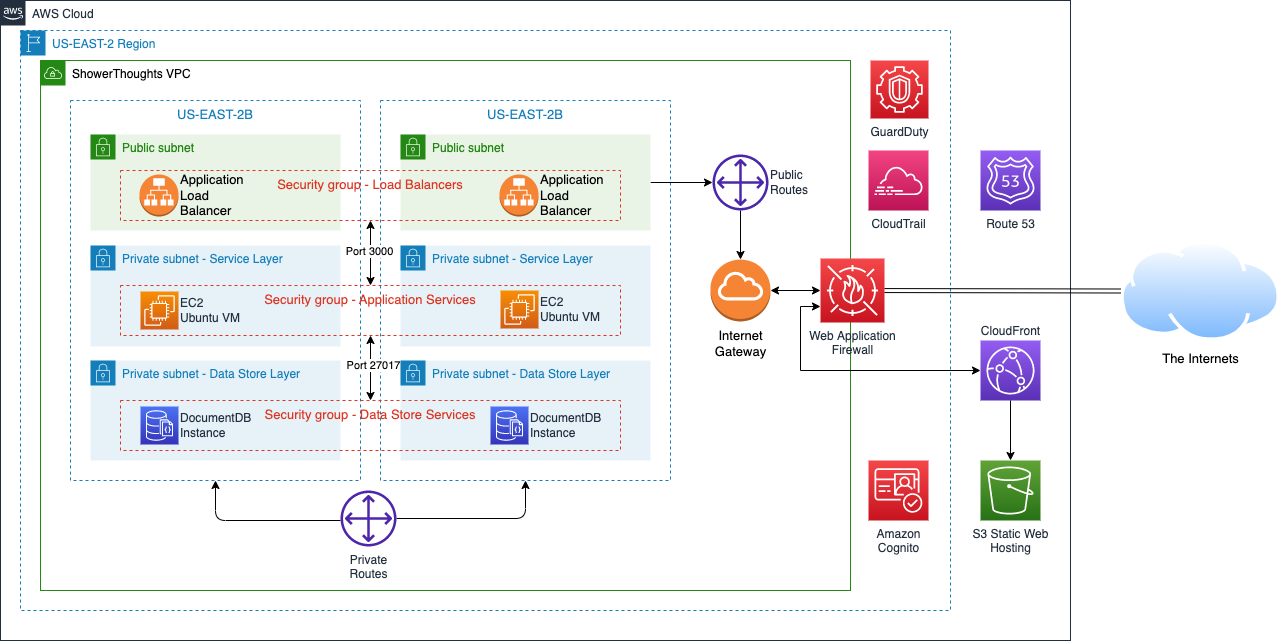
Part of our Zero Trust Architecture design is that we don’t trust the “Internet” to not mess with our systems. Whether constantly trying to scan for open ports or through an all-out distributed denial of service attack, we need to be sure our proverbial doors are locked, and our security cameras are working. By default, we already get a degree of DDoS protection just by using CloudFront, Route 53, and Application Load Balancers. Collectively, AWS calls this built-in protection AWS Shield Standard. They also have a deluxe version called AWS Shield Advanced, which gives you access to the AWS Shield Response Team, and if your autoscaling goes crazy trying to absorb the DDoS attack, you’re protected from the cost implications. If you have a large landscape with lots of public-facing nodes, AWS Shield Advanced might be a good option, but for us, we’ll just stick to the economy edition.
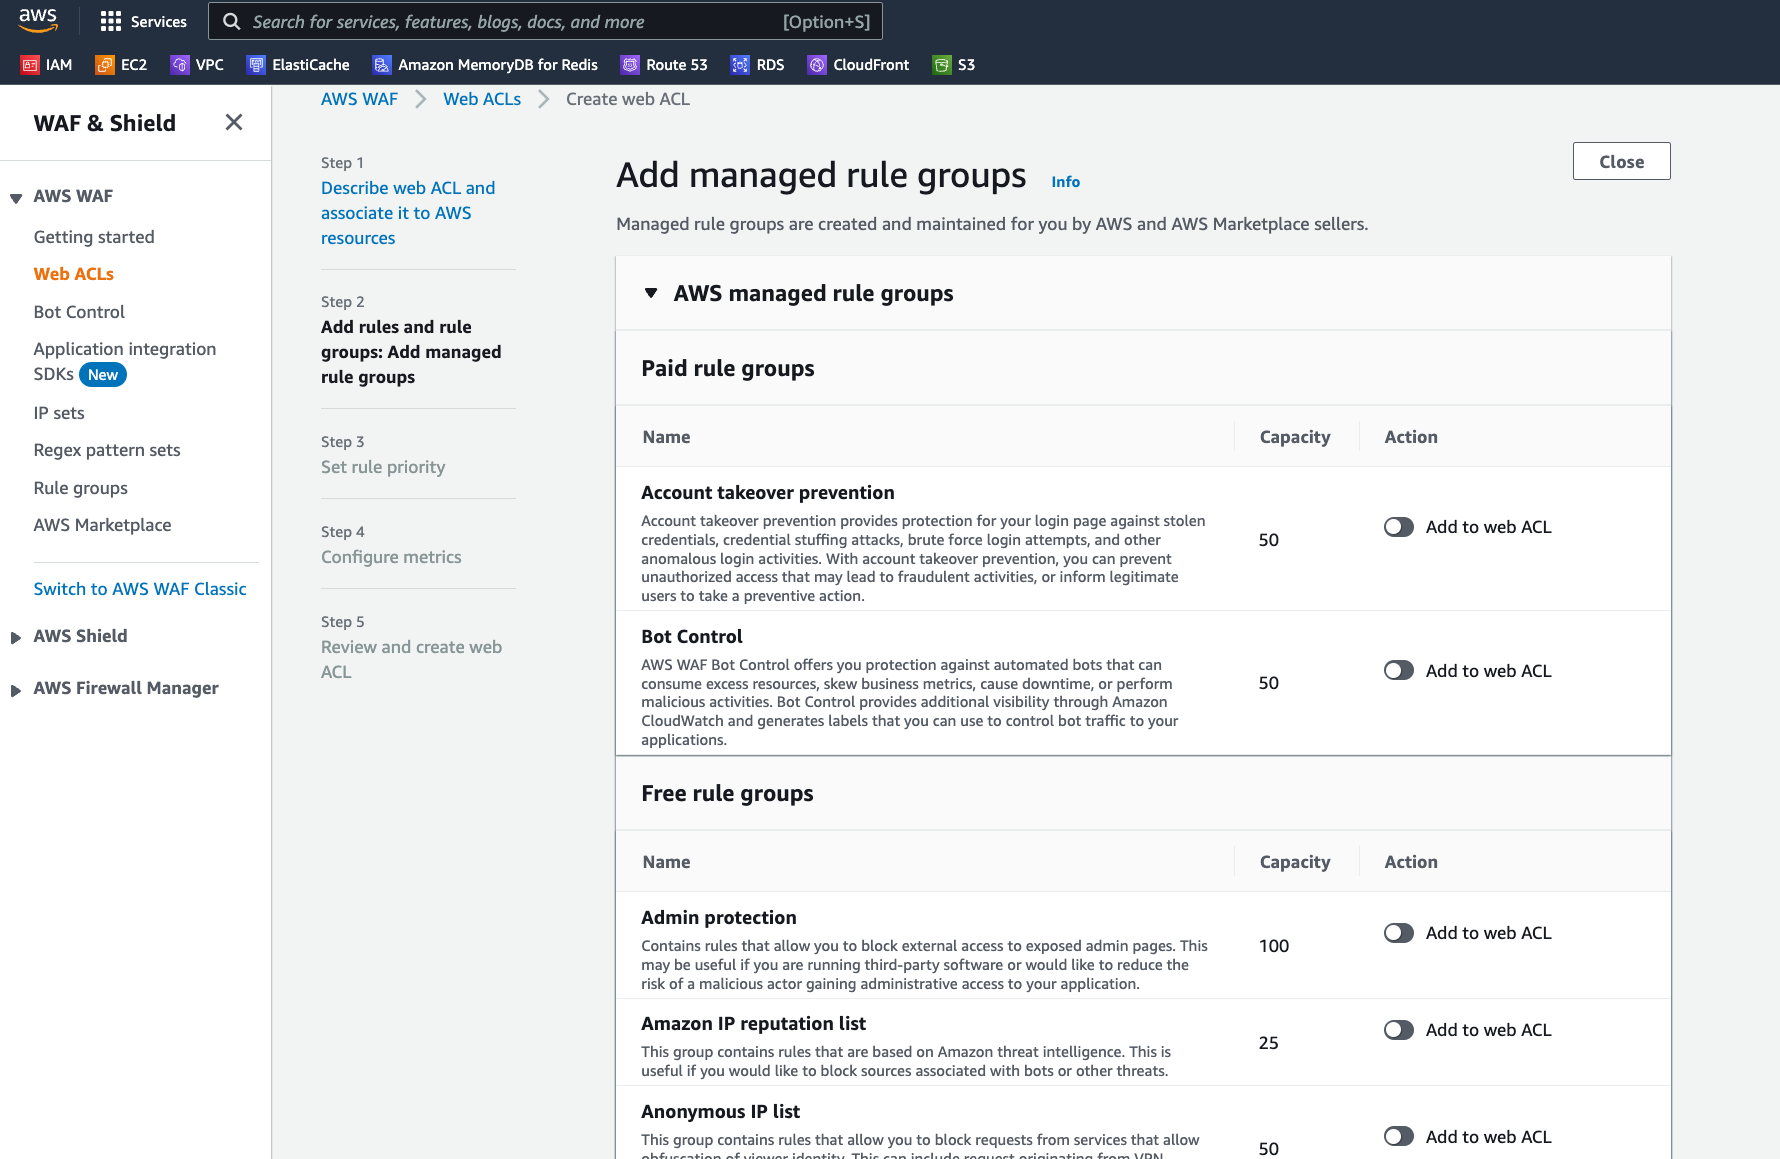
We can also turn on Network Firewalls and Web Application Firewalls. Network Firewalls are what you probably think of with a traditional firewall that operates down at Layer 3 and Layer 4 of the OSI Model. Web Application Firewalls (WAFs) work up at the Application Layer (Layer 7) and help guard against more sophisticated attacks like SQL injection or cross-site scripting.
Setting up a WAF around our resources is pretty simple…a wizard walks you through the process and lets you select from a variety of rule sets continuously maintained by the biggest names in network security. Some are free to use, but some do require a subscription. For example, we can turn on a rule to block IPs that are known by Amazon to be associated with bots or other services.
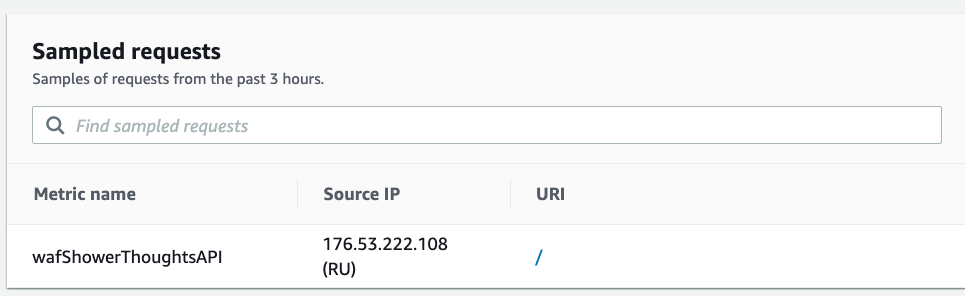
Within 5 minutes of my WAF being up around my application, I already had someone come knocking…
As an aside, I once did a research project where I placed “honeypots” resembling industrial control systems in different regions on AWS, Azure, and GCP to compare and contrast the bot traffic. In a two-week period of time, my honeypots received millions of scans. There is an IMMENSE amount of bot traffic out there…some estimate around 42% of all internet traffic. Your applications WILL be scanned and as much data will be collected about them as you allow.
Eye in the Sky
A good Zero Trust Architecture approach will always include robust logging for each and every part of the system. Logging will include not just the stuff that is working correctly but also stuff that may not be working correctly…such as denied logins or cases where tokens are incorrect. These little activities could indicate someone trying to mess with your stuff. So, we want ways to capture that activity and act on it.
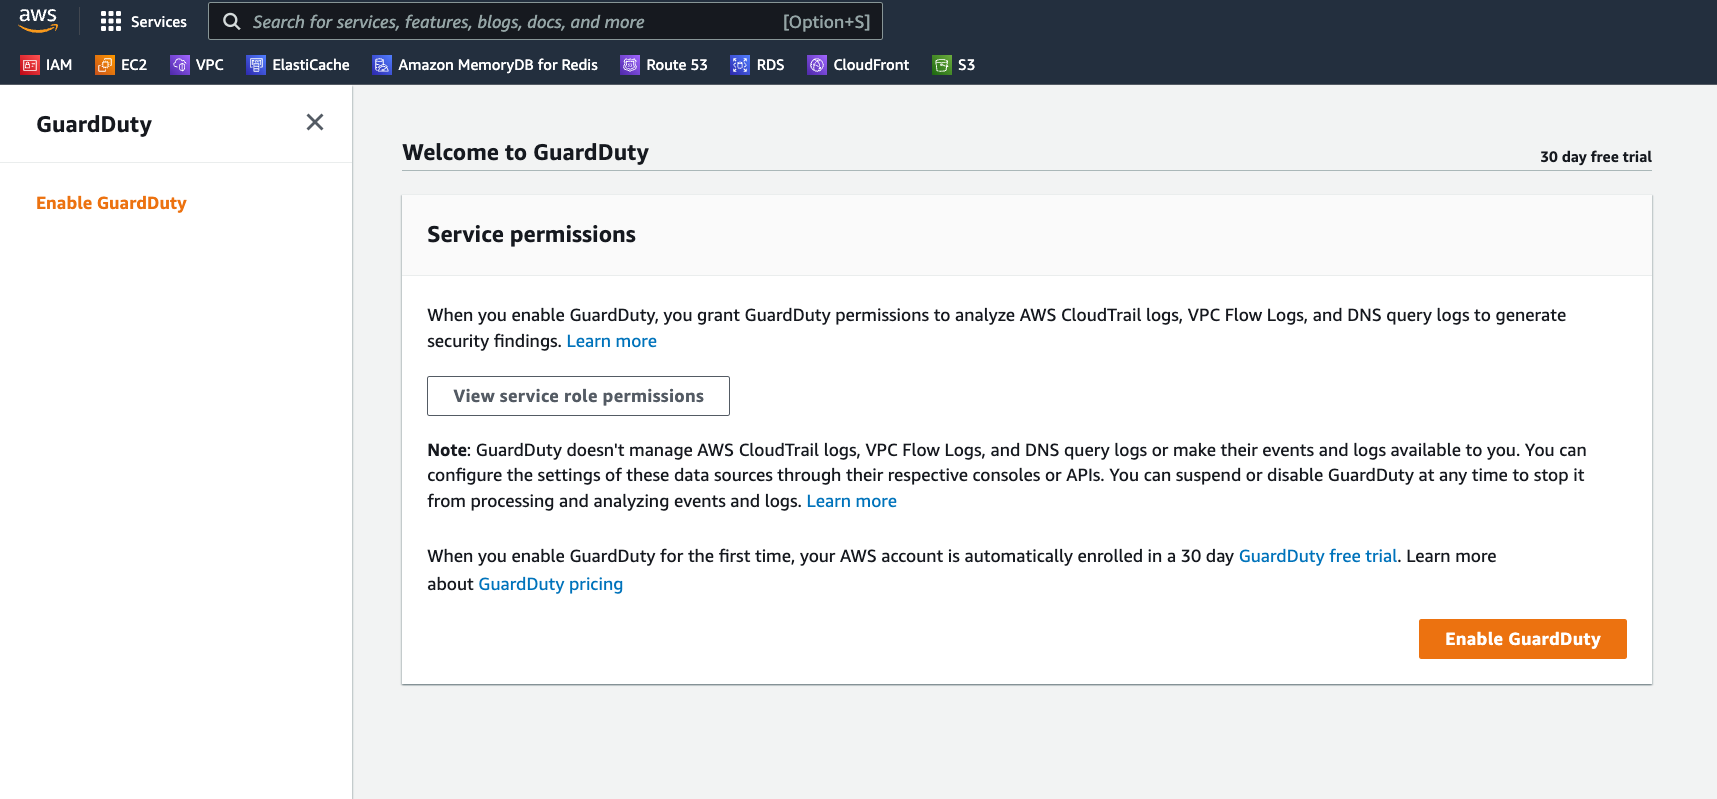
Now, it’s one thing to say “log everything” but another thing entirely to sift through all those logs and look for small little anomalies amid what we would hope are volumes and volumes of perfectly normal activities. Impossible to do manually but very possible for machines–machine learning algorithms, that is. AWS GuardDuty is a service which can sweep all the activities logged in CloudTrail, VPC Flow logs, and DNS query logs into a pile and automatically identify security findings. It is literally push-button simple to enable and will dutifully watch for any shenanigans.
By the way, EVERYONE, at a minimum, should enable AWS CloudTrail for all their AWS accounts, even if they are just sandbox accounts. CloudTrail will track every API call into your account and can be a good way to catch someone using an errant access key or stolen credentials. Do it NOW!
Georestriction
Another way to reign in our attack surface is to simply make our service unavailable for certain geographies through georestriction. Of course, anyone with a VPN can still get to your app, but if we don’t “advertise” ourselves in certain geographies we don’t want to be in, that’s probably a good thing. Additionally, sometimes, we must intentionally prevent access from some countries, such as in cases of media licensing agreements or local privacy laws.
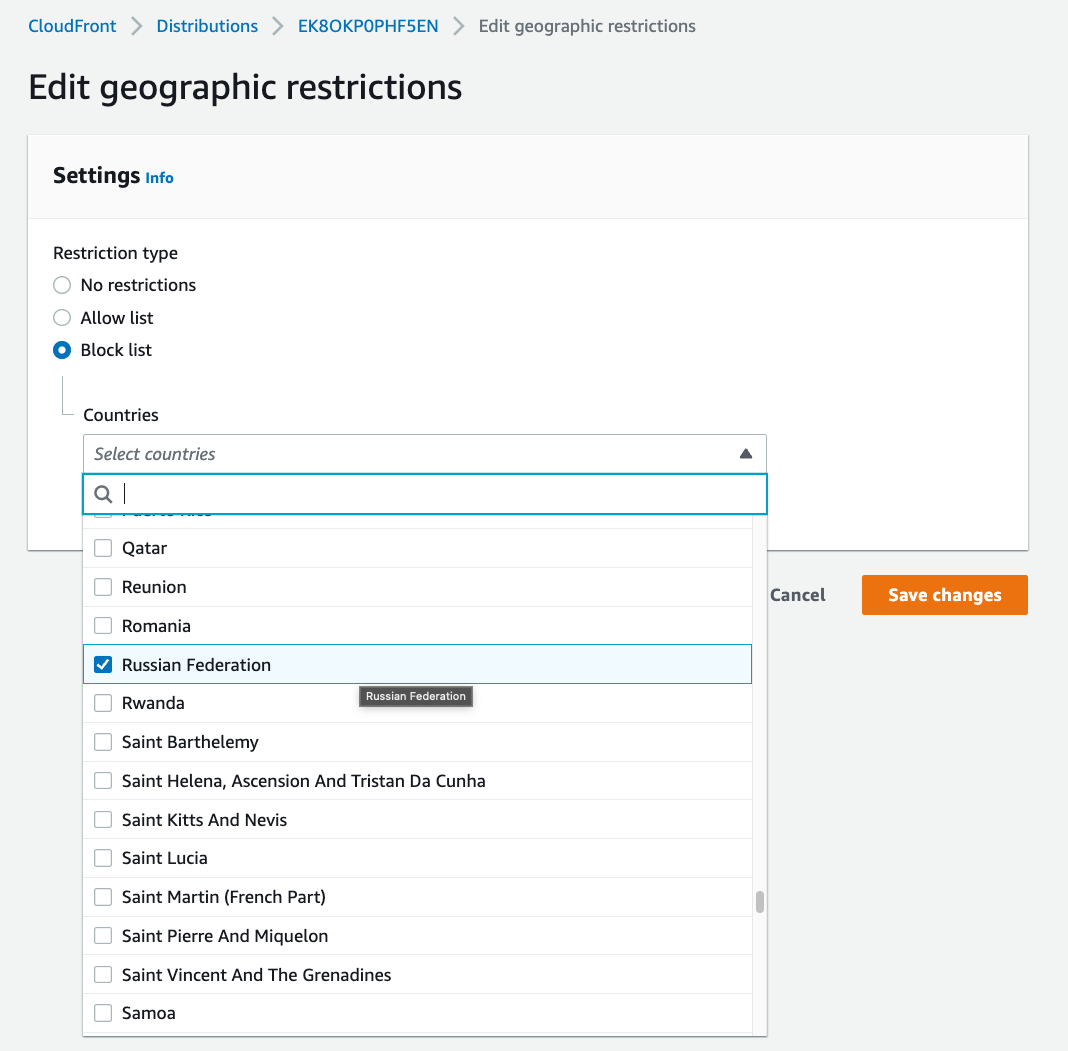
In CloudFront, which is hosting our static HTML content, we can set up an Allow/Block list for different countries. When the client attempts to access the content, CloudFront will do a geo-location lookup based on the IP and then either serve it up or not.
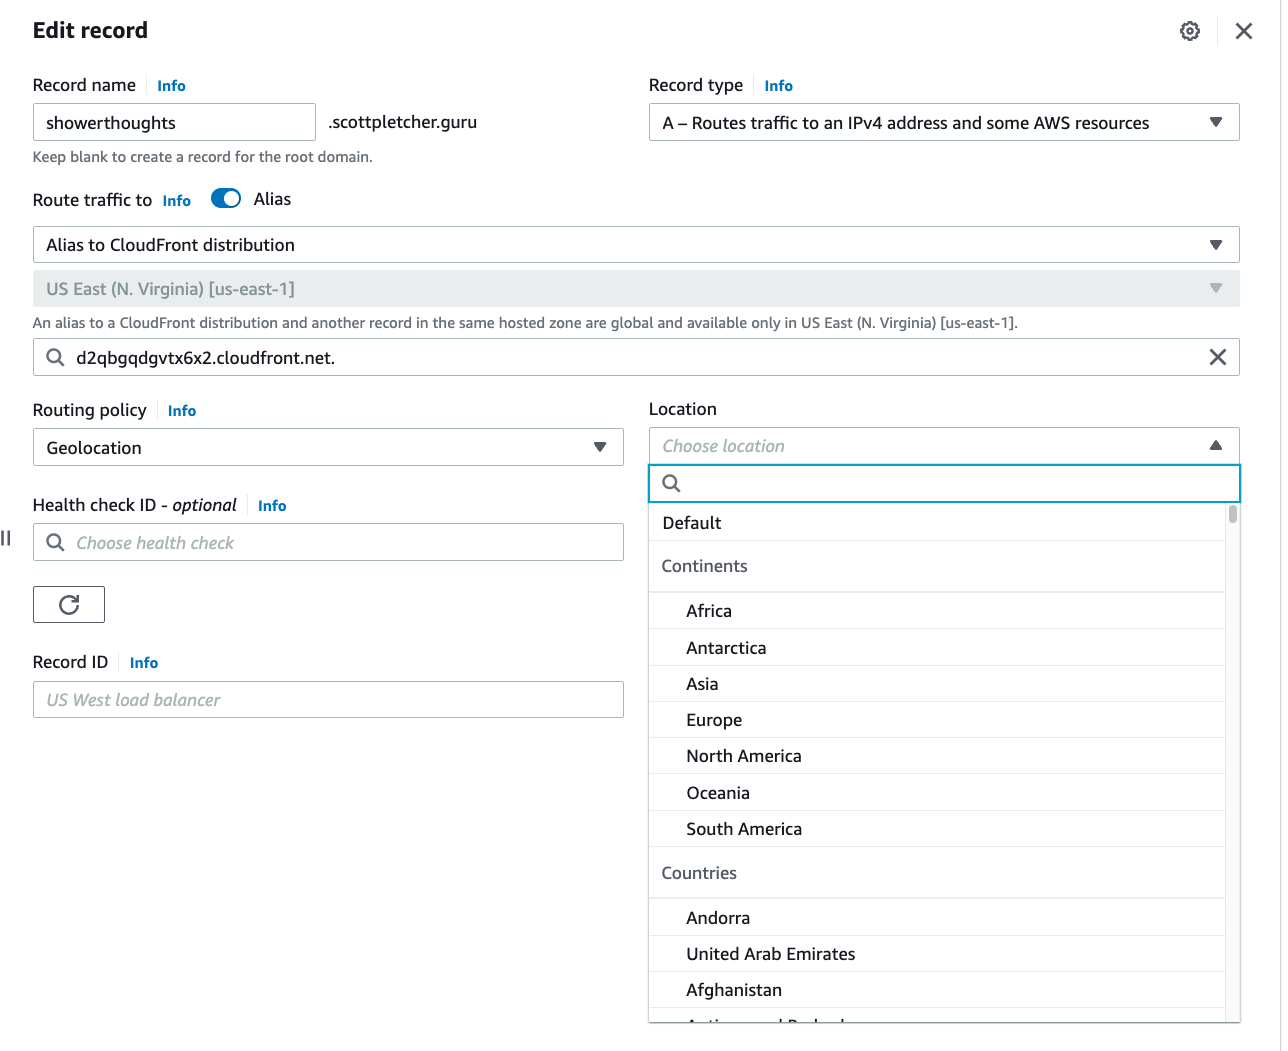
Similarly, Route 53 also allows us to create conditional DNS records based on the location of the client. This can be useful if you want to direct traffic to resources closer to the client or provide a localized version of a website. If through our GuardDuty findings, we see a consistent amount of bad traffic coming from a particular geography, we can have that traffic resolve to 127.0.0.1 or redirect to someplace else. (Note: I would NOT redirect bad traffic to another location which you do not own…that is most definitely against the TOS for AWS!) If you do use this geolocation routing feature, do be sure to also include a default record as a fallback. Geolocation isn’t always reliable, and if the IP address location comes back as unknown, you probably still want to serve something up.
Wrapping Up
Let’s take stock of what we’ve accomplished:
- We’ve re-architected our application to make it more robust
- We’ve added a decent user repository
- We’ve segmented the parts and pieces into their own protected compartments
- We’ve enabled robust logging and access controls
- We’ve created some geolocation restrictions to limit access
Now, we could do much more… Such as adding MFA to our user login process or implementing some more monitoring and tracking features. We could even use Amazon AppStream to create a sort of kiosk front-end for our app such that NOONE directly touches any of our services, but everything is handled through an ephemeral virtual desktop session.
Or, for the ultimate in security, we can just shut everything down and do what people have been doing for millennia…just let those genius shower thoughts float right on by.
Scott’s Zero Trust Architecture Series
- Zero Trust Architectures Part 1: Refactoring ShowerThoughts
- Zero Trust Architectures Part 2: Compartmentalization and Segmentation
- Zero Trust Architectures Part 3: Shields up!