
Author: Jeremy Morgan
Visual Studio does a lot of neat things for us. It creates projects, solutions, testing, and more at the click of a few buttons. But what if you aren’t using Visual Studio? What if you’re in Linux or a Mac? If you are, you’re using the Dotnet driver (CLI) to scaffold, run, and build applications. I prefer to use the CLI because it’s powerful and easy to automate.
The Dotnet CLI comes from .NET Core. Not long ago, we had a .NET Framework for Windows and .NET Core for everything else. Then Microsoft merged the .NET Core and traditional .NET framework making .NET 5 the main implementation of .NET. Here’s more about .NET 5 if you’re curious. We’re now at .NET 6, and it’s more mature and stable than ever.
If you’re curious about how to use the dotnet command line and Visual Studio Code to create an application, you’ve come to the right place. This tutorial will require:
You should know a little C# for this tutorial as we’re not going to be focusing on the language as much as the dotnet CLI tool.
Notice I don’t specify an operating system because this tutorial will work no matter what you’re running .NET with. Let’s get started.
What we’ll build
Today we’re going to build a command line application. This application will convert strings separated by underscores into camel case text.
It will turn This_is_a_string into thisIsAString
But we want to write some unit tests to ensure it’s working correctly. So we’ll make the method public, set up a solution with NUnit testing, and tie it all together.
We will:
- Create a solution
- Create a Command Line application
- Add functionality and spot-check it
- Create NUnit tests for it
And we’ll do it all with the .NET CLI.
Step 1: Creating Your Solution
The first step we want to do is to create our solution. Visual Studio generally handles this for us. Open up a terminal and choose a folder to store your files.
I’m going to call this solution ‘stringToCamel’.
dotnet new sln -o stringToCamel
You should see the following message:

Now, let’s go into our directory:
cd stringToCamel
and check to see that the CLI created our solution file:
dir /b

Perfect, now let’s use the dotnet CLI to create a new console application.
Step 2: Creating Your Console Application
Next, we’ll create our console application and name it stringToCamel.App
dotnet new console -o stringToCamel.App
This will create our console application.
We’re telling dotnet:
- new - to create a new application
- console - for the type of application
- -o - set the output name
- stringToCamel.App - the name we want for our application.
This will scaffold out a new console application in our folder, with a subfolder named stringToCamel.App
We can now open up our folder in Visual Studio Code.
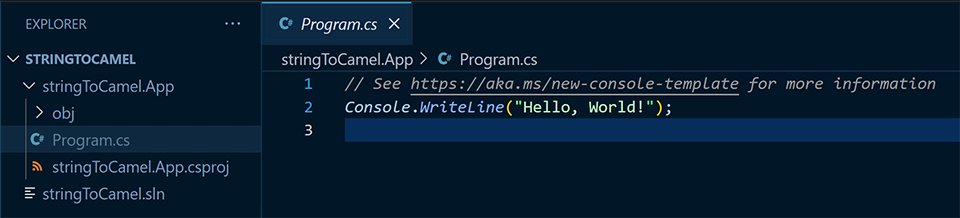
If you open up Program.cs within the stringToCamel.App folder, you’ll see two lines of code:
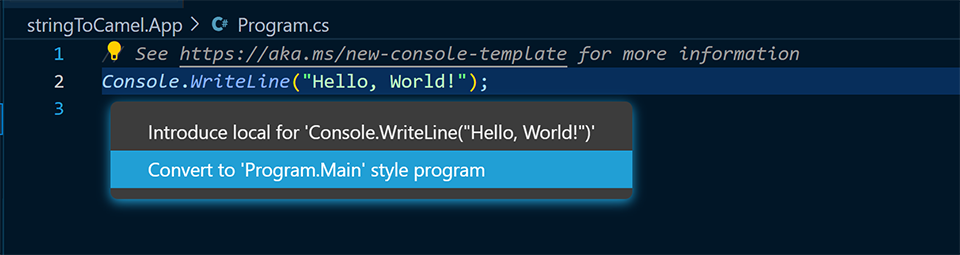
This is because .NET 6 generates top level statements in the compiler for you.
We want to use the Program.Main style: If you click the tooltip hint next to the line, you’ll find a function to do that. This uses the older style where we’re explicit with our classes, that way, we can make things public and testable.
The code will now look like this:
internal class Program
{
    private static void Main(string[] args)
    {
        Console.WriteLine("Hello, World!");
    }
}
But it functions the same. Let’s change it to include the functionality we want to use it for.
Change
internal class Program
to
public class Program
And add in the following at the top of the file:
namespace stringToCamel.App;
We’ll create a public static method that takes a string str as an input parameter and returns a string.
public static string ToCamelCase(string str)
{

}
We’ll create a temporary string that we’ll send out once the method has been completed:
string tempOut = string.Empty;
Next, we want to split the string by the underscores. This is crucial to our application because we’re going to remove the underscores and combine the words while capitalizing all but the first one. str.Split("_") will break our string into a string array with each word separated by underscores.
var tempstring = str.Split("_");
Let’s loop through the elements in that string array with a foreach loop:
for (int i = 0; i < tempstring.Length; i++)
{
}
Now, from here, we could take each element, capitalize the first character and assemble it.
However, we want to leave the first letter of the first word to be lowercase. Then every word after that, the first letter will be uppercase.
So we’ll say, if its the first element (word) in the array, let’s make sure the first character is lowercase:
if (i == 0)
{
    tempOut += char.ToLower(tempstring[i][0]) + tempstring[i].Substring(1);
}
If it’s any element after that, let’s make the first character uppercase:
else
{
    tempOut += char.ToUpper(tempstring[i][0]) + tempstring[i].Substring(1);
}
Notice we’re appending these elements (words) to tempOut. This is what we’ll return:
return tempOut;
The Complete Method
The method now looks like this:
public static string ToCamelCase(string str)
    {
        string tempOut = string.Empty;

        var tempstring = str.Split("_");

        for (int i = 0; i < tempstring.Length; i++)
        {
            if (i == 0)
            {
                tempOut += char.ToLower(tempstring[i][0]) + tempstring[i].Substring(1);
            }
            else
            {
                tempOut += char.ToUpper(tempstring[i][0]) + tempstring[i].Substring(1);
            }

        }
        return tempOut;
    }
Great! Let’s call it in our application and see what it looks like.
In our program entry point, change the hello world to this call:
private static void Main(string[] args)
{
  Console.WriteLine("Enter a string to convert");

  string? userInput = Console.ReadLine();

  if (userInput == null)
  {
      return;
  }

  Console.WriteLine(ToCamelCase(userInput));
}
Here we’re asking for input. It’s a nullable field, so if the user doesn’t type in anything, it exits. If they type in a string, it will write it out after running it through our ToCamelCase method.
Let’s try it out.
cd stringToCamel.App
dotnet run
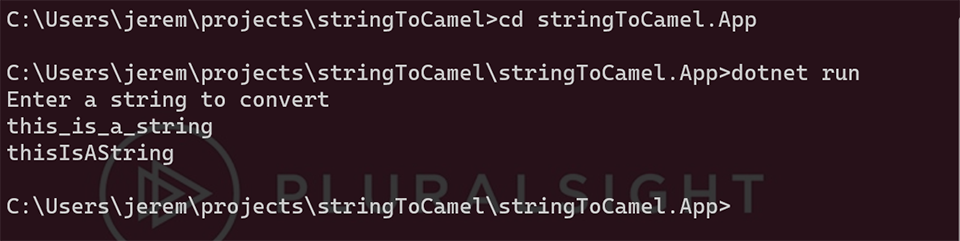
And we enter our string, and it looks great. This is our “spot check” to ensure the method performs appropriately. Let’s build some real tests for it.
Step 3: Creating Your Unit Tests
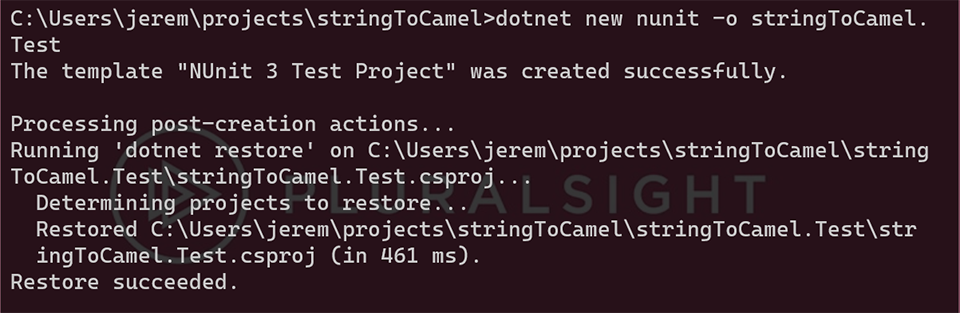
For our tests, we’re going to use NUnit 3. Let’s create a new NUnit project. Go into the base folder of your project (stringToCamel)
and type in the following at the console:
dotnet new nunit -o stringToCamel.Test
It will create a new NUnit 3 test project.
Next, add the project to your solution:
dotnet sln ./stringToCamel.sln add ./stringToCamel.Test/stringToCamel.Test.csproj
Type in
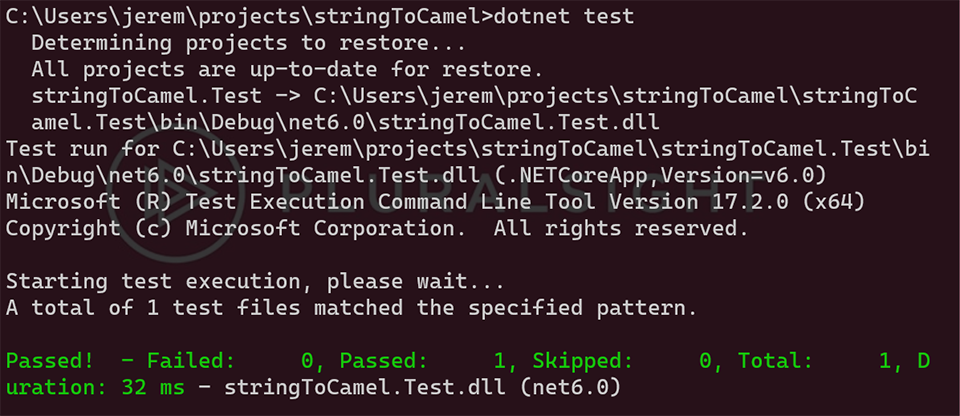
dotnet test
to verify. You should see something like this:
Now, let’s jump into our test project and write some tests for our application.
Open up the project, and it should look something like this:
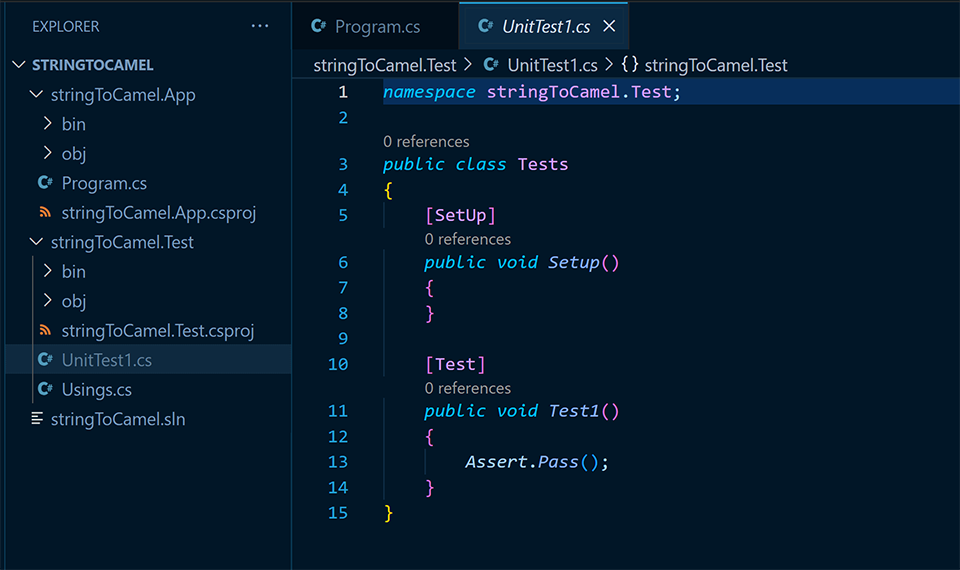
Before we can write tests for our application, we’ll need to tie this project to our application.
First, we’ll add a reference to the application.
In the console, in your stringToCamel.Test folder, type in the following:
dotnet add reference ..\stringToCamel.App\stringToCamel.App.csproj
Then, open up usings.cs and add the following:
Then, open UnitTest1.cs and replace:
Assert.Pass();
with
Assert.That(stringToCamel.App.Program.ToCamelCase("this_is_a_string"), Is.EqualTo("thisIsAString"));
And save the file.
Now at the command prompt in your solution folder, type in
dotnet test
And you should see this.

Congratulations, you’ve set up a fully tested console application project with the dotnet CLI!
Summary
This is a step-by-step guide for setting up a complete solution with the dotnet command line. This can be helpful if you’d like to unit test your dotnet console applications. However, most of the time, I test class libraries.
I’m a strong advocate of Unit testing whenever you can, and .NET apps are no exception. While Visual Studio sets this up for you and integrates things very well, you can manually set it up with command lines apps like so.
If you’d like to learn more about C# and .NET, check out:
And be sure to follow Pluralsight on Twitch for our C#/.NET streams on All Hands on Tech Live!
Questions? Comments? Let me know!