
Author: Jeremy Morgan
Welcome back! This is part two of the tutorial we started earlier this week where we built a web API with an Azure function. Now, we’re going to connect to that with a Blazor application.
What we’ll do:
- Deploy our Azure functions application
- Write a Blazor application to connect to it
- List, add and delete items.
I recently did this live and decided to write it out to share the code with you. Let’s jump in!
Publishing our Azure Functions application
Before we deploy our Azure function, we need to create a space for it. In the Azure portal, search for “functions”:
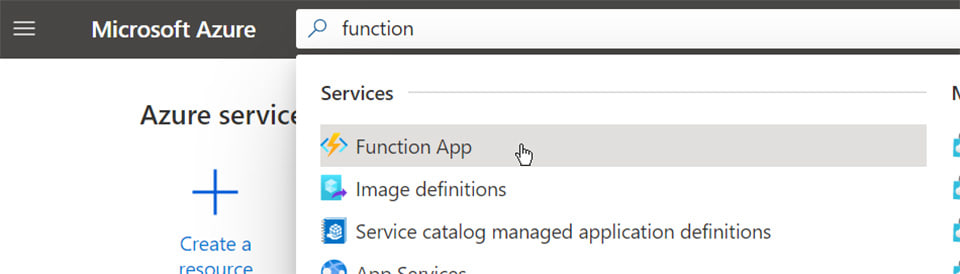
Click “Create”
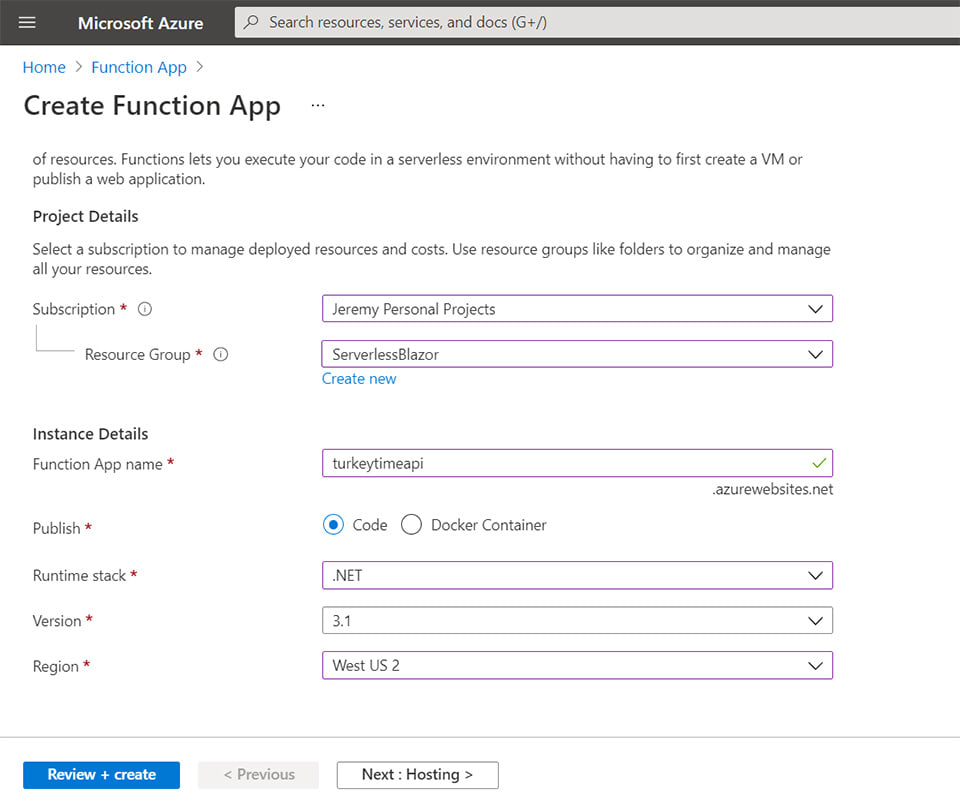
Here you’ll be able to configure your function. You’ll want to set:
- Your subscription
- You Resource group
And create a name for your function app. This will be the URL you interact with for the API. I chose turkeytimeapi.azurewebsites.net.
Next, you want to set your runtime stack to .NET and version 3.1
Finally, you select your Region.
Now, click Review and Create, and if everything looks good, create it. This will be where we deploy our Azure Function.
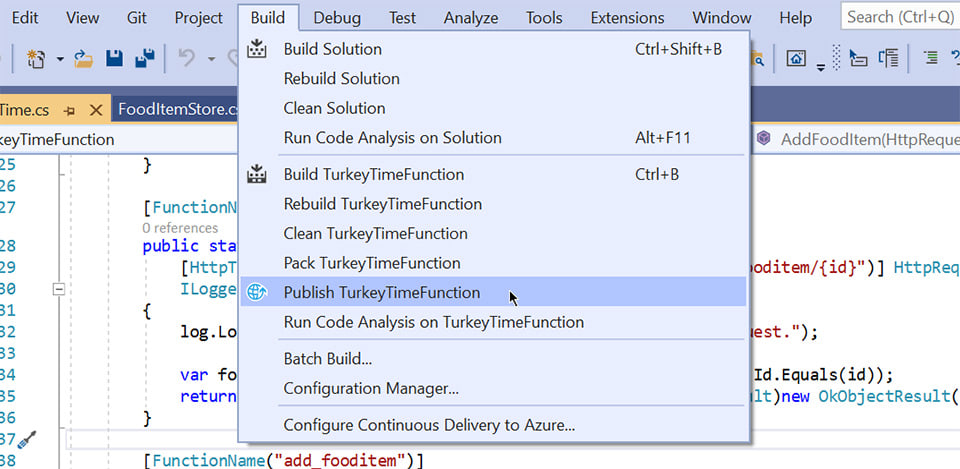
Open up Visual Studio, and in your project, select build -> Publish (name of your project)
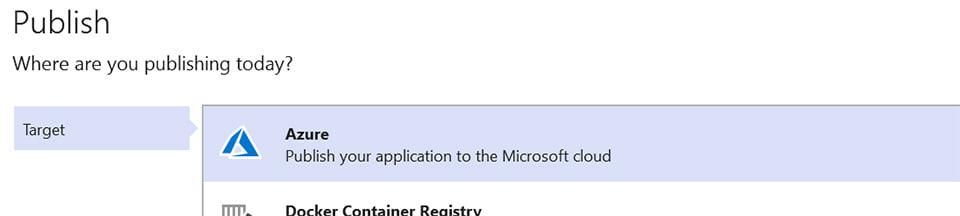
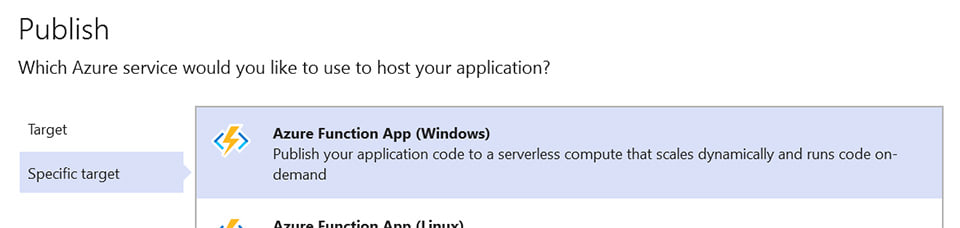
In the next screen, select Azure.
Then Azure Function App (Windows)
In the next screen, you’ll be able to find the function you just created from the Azure Portal:

Select where you want to deploy it, and click Finish.
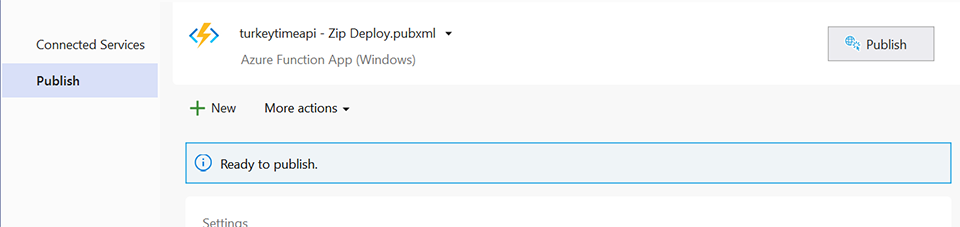
In the next screen, click Publish. This will push your Azure function to the cloud.
Configuring access to your Azure Function API
Before you can interact with your API, you’ll need to make some changes.
Open up the resource in the Azure portal, and scroll down to CORS:
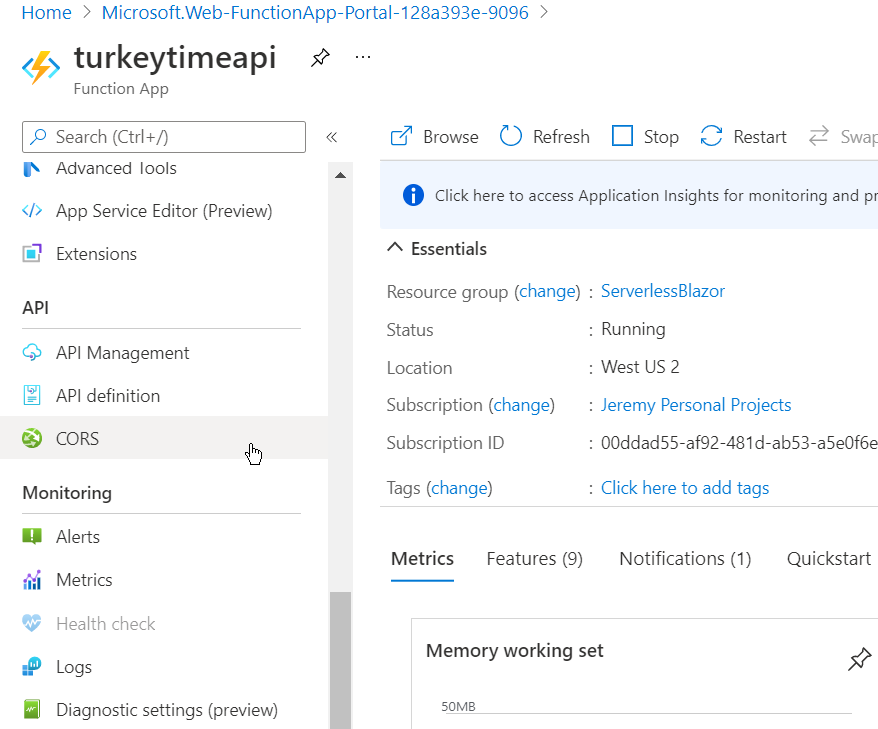
Click that to open up your CORS settings.
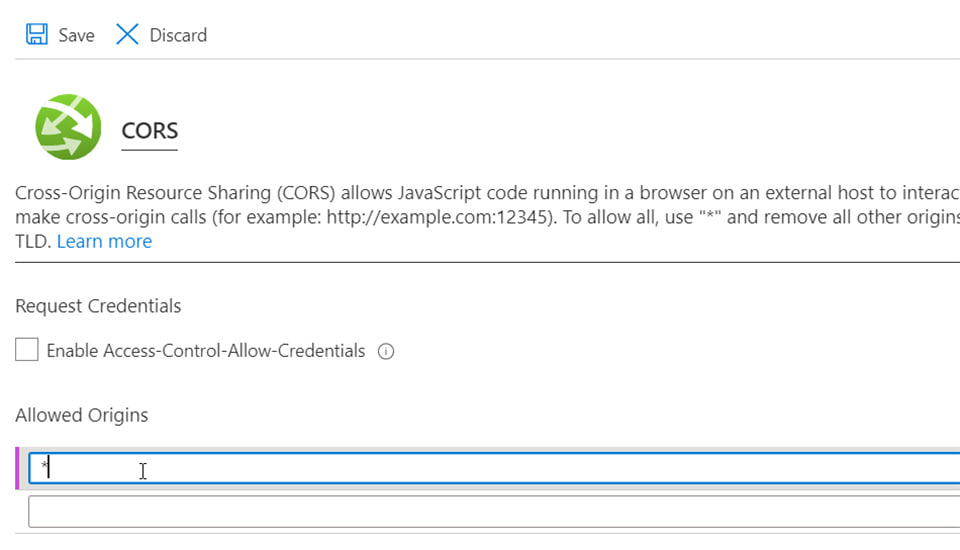
Add * as your allowed origin to allow all requests.
Note: In a production environment, you’d want to include the URL of your web domain, NOT a wildcard.
Now, let’s build our Blazor app!
Creating a new Blazor application
What we’re going to do here:
- Create a new Blazor WebAssembly project
- Create a Razor Component to interact with the Web API we built
- List, create and delete objects from the API
Open up Visual Studio again, and we’re going to create a new project.
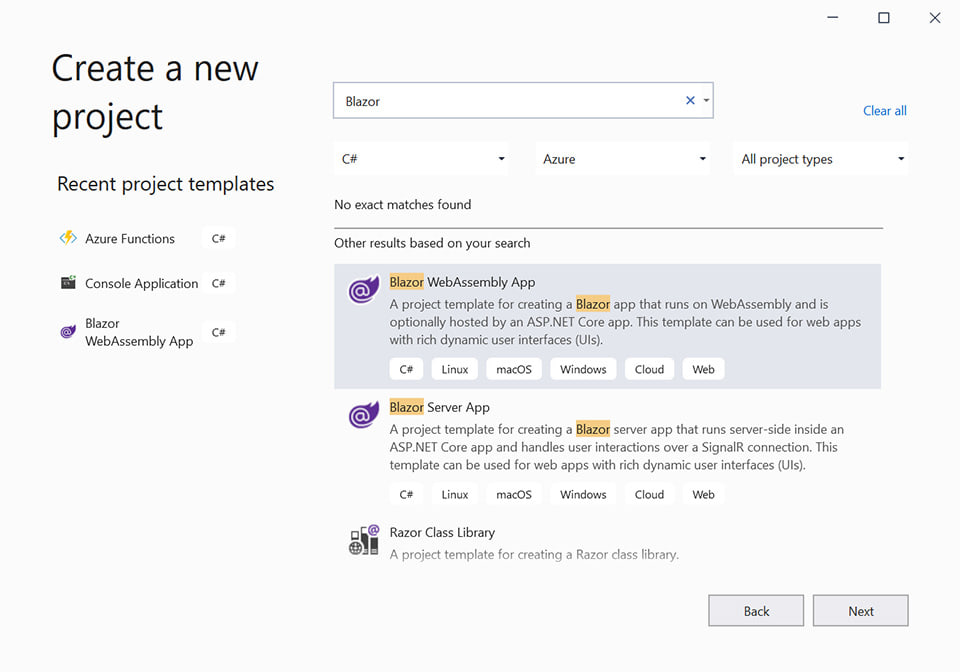
Search for the “Blazor” template, and look for Blazor WebAssembly App. Click next.
Name your application whatever you’d like.
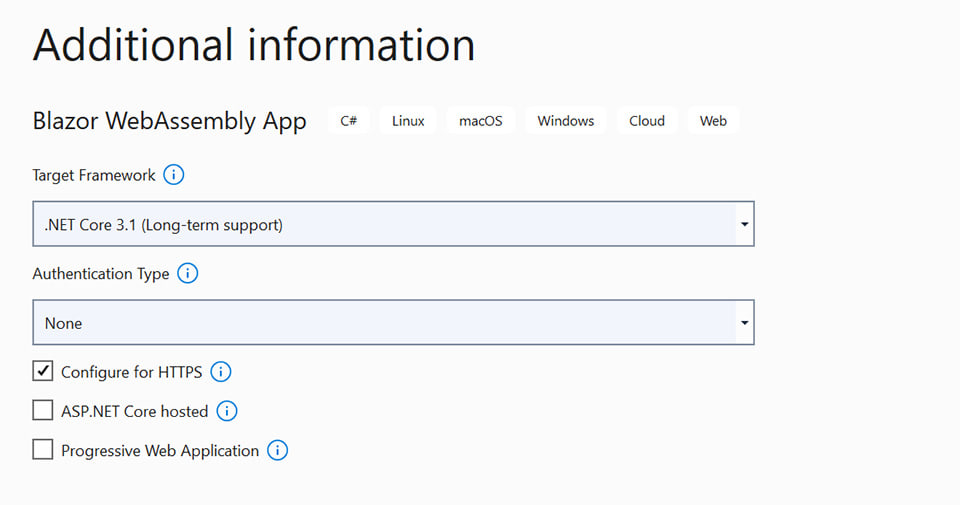
In the next screen, select .NET Core 3.1 (Long-term support) and an authentication type as None. Make sure Configure for HTTPS is checked.
Click Create. Now we’ve created a new Blazor app.
Getting the project ready
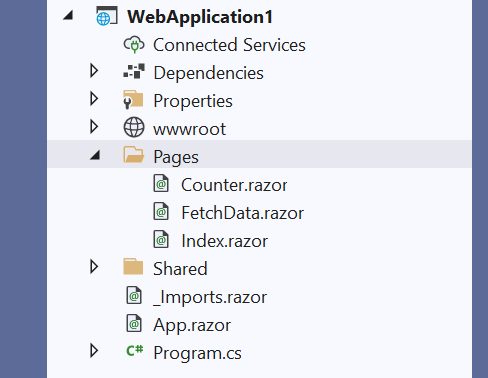
Visual Studio scaffolds a nice Blazor application to start with, but let’s clean it up a little. Then we’ll create the Razor component we’ll use to communicate with our API.
Remove Counter.Razor and FetchData.razor from the project.
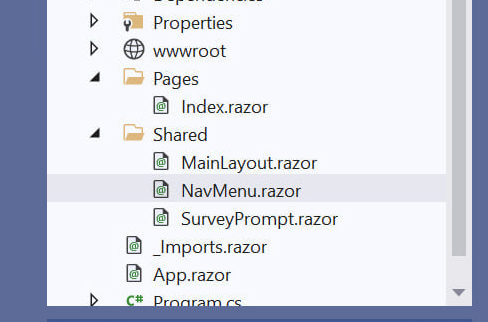
Now, open up Shared/NavMenu.razor
Go to the nav menu (the starts at line 8) and remove the following lines of code:
<li class="nav-item px-3">
  <NavLink class="nav-link" href="fetchdata">
    <span class="oi oi-list-rich" aria-hidden="true"></span> Fetch data
  </NavLink>
</li>
Change the list item above that to point to /fooditemlist. Your menu should look like this:
<div class="@NavMenuCssClass" @onclick="ToggleNavMenu">
    <ul class="nav flex-column">
        <li class="nav-item px-3">
            <NavLink class="nav-link" href="" Match="NavLinkMatch.All">
                <span class="oi oi-home" aria-hidden="true"></span> Home
            </NavLink>
        </li>
        <li class="nav-item px-3">
            <NavLink class="nav-link" href="fooditemlist">
                <span class="oi oi-plus" aria-hidden="true"></span>Food Items
            </NavLink>
        </li>
    </ul>
</div>
Great! Now we can create a new Razor component named fooditemlist.razor that will manage our list of food items.
Creating the Razor component
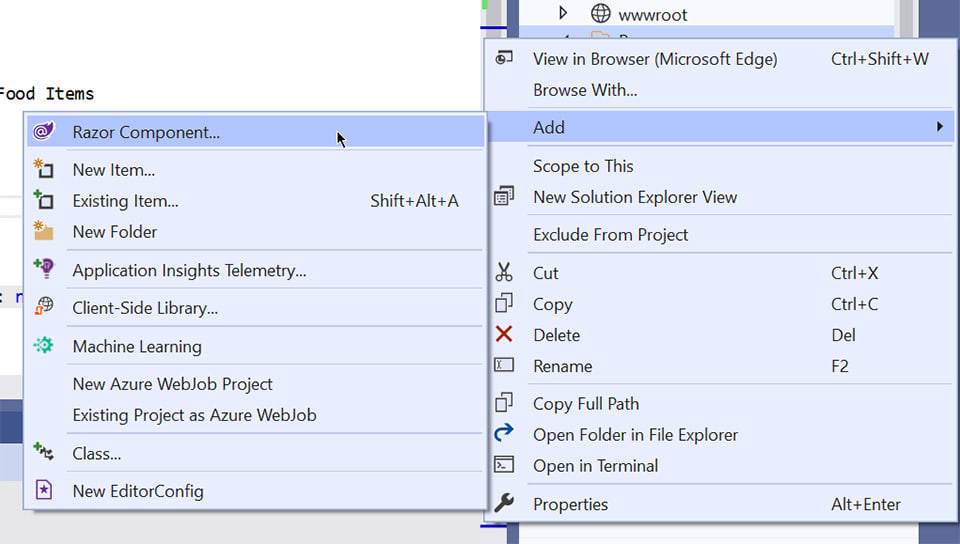
Now let’s create that component. In the Pages folder, add a new Razor component. Name it Fooditemlist.razor.
At the top of that component, add the following code so we can route the requests to it:
@page "/fooditemlist"
Next, we want to add some HTML here to display our food items in a table.
<p>@DisplayMessage</p>

@if (_foodItems != null)
{

    <table class="table">
        <thead>
        <tr>
            <th scope="col">Name</th>
            <th scope="col">Person</th>
            <th scope="col">Gluten Free?</th>
            <th scope="col">Vegetarian?</th>
        </tr>
        </thead>
        <tbody>
        @foreach (var fooditem in _foodItems)
        {
            <tr>
                <td>@fooditem.Name</td>
                <td>@fooditem.Person</td>
                <td>@fooditem.Glutenfree</td>
                <td>@fooditem.Vegetarian</td>
            </tr>
        }
        </tbody>
    </table>
}
else
{
    DisplayMessage = "Hello!";
}
If we look at this code, we can see it has a mix of HTML and what looks like C# code. This is Razor code. It’s a mix of dynamic code and HTML. You can learn more about Razor in our course Razor Pages in ASP.NET Core: Getting Started
We’re going to create a list, _foodItems, and once that’s populated, we’ll loop through it and display the values in the cells of the table, using binding:
@foreach (var fooditem in _foodItems)
{
  <tr>
    <td>@fooditem.Name</td>
    <td>@fooditem.Person</td>
    <td>@fooditem.Glutenfree</td>
    <td>@fooditem.Vegetarian</td>
  </tr>
}
So this will handle the display portion of the file for now.
Creating a model
Now we need to create a model, and it will be the same one we used in the Azure function. This will be an in-memory representation of our Food object. It’s a POCO (Plain Old Class Object).
Create a folder named Models and create a new Class named FoodItem.cs:
using Newtonsoft.Json;
using System;


namespace WebApplication1.Models
{
    public class FoodItem
    {
        [JsonProperty(PropertyName = "id")]
        public string ID { get; set; } = Guid.NewGuid().ToString("n");
        [JsonProperty(PropertyName = "name")]
        public string Name { get; set; }
        [JsonProperty(PropertyName = "person")]
        public string Person { get; set; }
        [JsonProperty(PropertyName = "vegetarian")]
        public bool Vegetarian { get; set; }
        [JsonProperty(PropertyName = "glutenfree")]
        public bool Glutenfree { get; set; }
    }
}
Since we’re using JsonProperty attributes, you will need to install Newtonsoft.JSON to your project. We’ll use it in other places as well.
Adding functionality to our Razor Component
Now, back in Fooditemlist.razor we need scroll down to this section
@code {

}
Here we’re going to build our C# code to interact with the database. This will all compile to WebAssembly for use in the browser. No JavaScript required!
Add the following to the top of the file:
public string DisplayMessage { get; set; }
public FoodItem[] _foodItems { get; set; }
These are our properties for the display message on the page and the food items array we’ll use to display our food items.
Next, we’ll add a task to be called when the page loads up:
protected override async Task OnInitializedAsync()
{
       DisplayMessage = "hello!";
}
This sets our display message by default. We’ll add more to this method later. Next, we need to create a method to populate the table with data.
Populating the table with data
This method will make a GET request to the Azure functions app we built in the last article and populate _foodItems for consumption.
Add a reference to the top of the razor page:
@using System.Text.Json
@using Models
Then add the following method in the @code block:
private async Task PopulateTable()
    {

        HttpClient client = new HttpClient { BaseAddress = new Uri("[Your Azure Function URL]") };

        HttpResponseMessage response = null;

        response = await client.GetAsync(client.BaseAddress);

        if (response.Content is object && response.Content.Headers.ContentType.MediaType == "application/json")
        {
            var content = await response.Content.ReadAsStringAsync();
            _foodItems = JsonSerializer.Deserialize<FoodItem[]>(content, new JsonSerializerOptions { PropertyNameCaseInsensitive = true });
        }
    }
This method uses an HttpClient to connect to the URL exposed by your Azure function. It sends an Async request, and if the request comes back with a response, and it is JSON, it will then deserialize that JSON into a collection of food items.
You can now call this from our OnInitializedAsync method, so the table is populated when the page loads:
protected override async Task OnInitializedAsync()
{
  DisplayMessage = "hello!";
  await PopulateTable();
}
And now we’ll see a list of food items in the “database” of the Azure function.
Adding new items
Now we’d like to add new items to our database. Add the following HTML to the top of (HTML section) of the Razor component:
<label>Your Name?</label>
<input @bind="FoodItemName" />
<br />
<label>What are you Bringing?</label>
<input @bind="FoodItemPerson" />
<br />
<label>Vegetarian?</label>
<input type="checkbox" @bind="FoodItemVegetarian">
<br />
<label>Gluten Free?</label>
<input type="checkbox" @bind="FoodItemGlutenFree">
<br />
<button type="submit" @onclick="@AddFoodItem">Add Food Item</button>
Each of these will be bound to variables within the application (code section). Let’s add those at the top (below @code {)
public string FoodItemName { get; set; }
public string FoodItemPerson { get; set; }
public bool FoodItemVegetarian { get; set; }
public bool FoodItemGlutenFree { get; set; }
These are temporary properties that the input boxes will populate. We’ll grab those values with an AddFoodItem method.
The submit button is bound to the AddFoodItem method.
Add the following to the top of the component:
@using System.Text
@using System.Net.Mime
And add this method to the code:
private async Task AddFoodItem()
    {

        HttpClient client = new HttpClient { BaseAddress = new Uri("[Your Azure Function URL]") };

        HttpResponseMessage response = null;

        var payload = new FoodItem()
        {
            Name = FoodItemName,
            Person = FoodItemPerson,
            Vegetarian = FoodItemVegetarian,
            Glutenfree = FoodItemGlutenFree
        };

        var payloadString = new StringContent(System.Text.Json.JsonSerializer.Serialize(payload), Encoding.UTF8, MediaTypeNames.Application.Json);

        response = await client.PostAsync(client.BaseAddress, payloadString);

        if (response.IsSuccessStatusCode)
        {
            await PopulateTable();
            DisplayMessage = "added!";
        }
        else
        {
            DisplayMessage = response.StatusCode.ToString() + "\n" + client.BaseAddress.ToString();
        }
    }
Here we create a new “payload” which is a FoodItem object, and we populate it with data from our form fields. Then we serialize that into a JSON string and POST it asynchronously to our Azure function.
If it’s successful, we’ll repopulate the table and show the results.
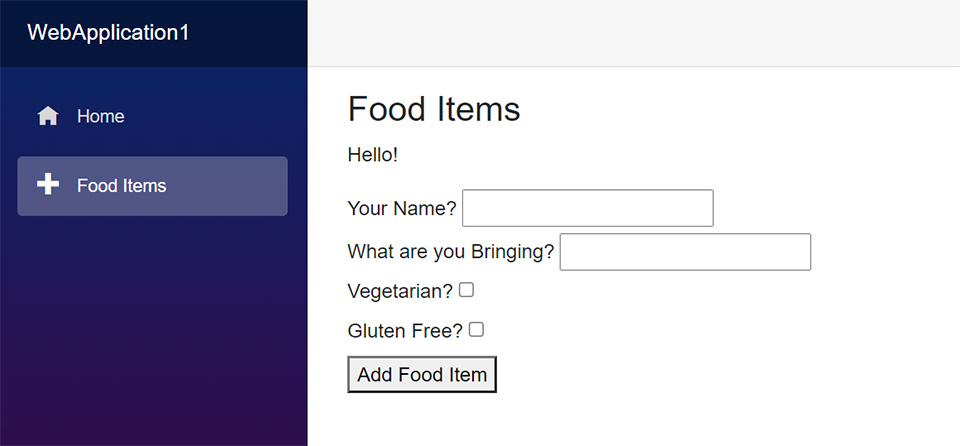
You can now run the application and see the new menu, and add items:
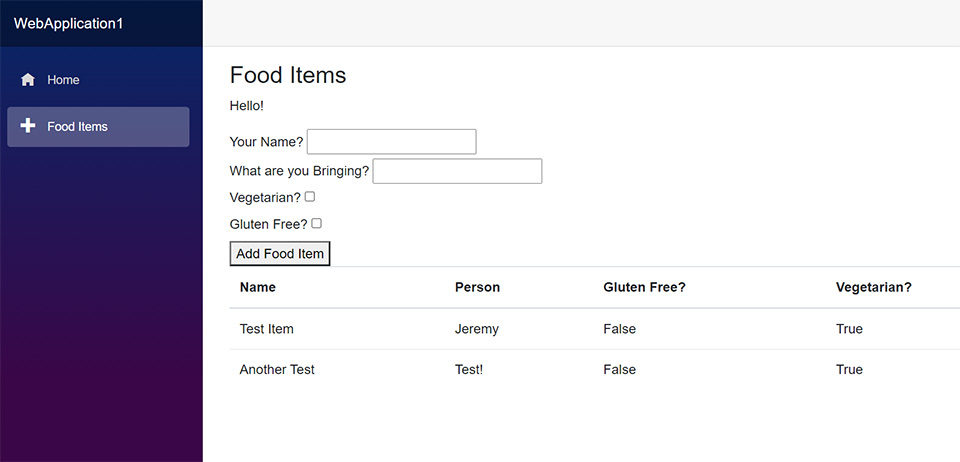
Your added items will automatically show up in the table below:
Great! Now we just need a method to remove them.
Deleting food items
The last part of our application will delete the food items. It’s similar to other methods we’ve built. It uses LINQ + JSON + HttpClient to find and delete items from our in-memory database.
Add the following method:
private async Task DeleteFoodItem(string id)
    {
        HttpClient client = new HttpClient { BaseAddress = new Uri("[Your Azure Function URL]" + id) };

        HttpResponseMessage response = null;

        response = await client.DeleteAsync(client.BaseAddress);

        if (response.IsSuccessStatusCode)
        {
            DisplayMessage = "We deleted: " + id;
        }

        await PopulateTable();
    }
This method uses HttpClient to call the Azure Functions API and appends the ID to the URL, so we make a DELETE call to that ID.
If it’s successful, we’ll display a message saying which ID was deleted. We’ll need to add this to our table in the HTML section of the Razor component.
Add another Table cell to the table, and add the following in the loop:
<td><button @onclick="@(() => DeleteFoodItem(@fooditem.ID))">DELETE</button></td>
This binds the food item ID and passes it into the DeleteFoodItem method we just created.
The final table should look like this.
<table class="table">
    <thead>
        <tr>
            <th scope="col">Name</th>
            <th scope="col">Person</th>
            <th scope="col">Gluten Free?</th>
            <th scope="col">Vegetarian?</th>
            <th scope="col">Action</th>
        </tr>
    </thead>
    <tbody>
        @foreach (var fooditem in _foodItems)
        {
        <tr>
            <td>@fooditem.Name</td>
            <td>@fooditem.Person</td>
            <td>@fooditem.Glutenfree</td>
            <td>@fooditem.Vegetarian</td>
            <td><button @onclick="@(() => DeleteFoodItem(@fooditem.ID))">DELETE</button></td>
        </tr>
        }
    </tbody>
</table>
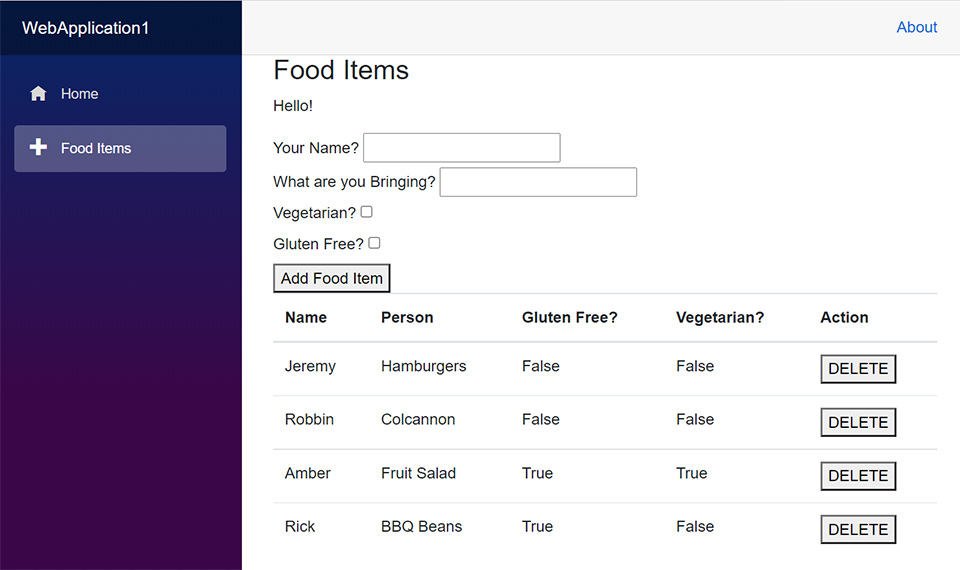
And now we can see the option available in our table to delete the item.

And now we can remove items in case we enter one by mistake.
Conclusion
This tutorial sure was a long one, but we’ve learned how easy it is to create Azure Functions that act as a Web API that you can interact with. Then we built a Blazor WebAssembly application to interact with it. This is the future of .NET development. You can make your applications lean, fast, and scalable using these technologies.
If you have any questions or comments, feel free to reach out to me.
If you’d like to learn more about creating Blazor applications, Pluralsight has a selection of great new courses on Blazor.